
The Bosworth 1485 project
Introduction
The Battle of Bosworth, Monday 22nd August 1485, saw the armies of the Lancastrian and Yorkist sides clash, not for the last time (Stoke Field), but certainly it was the most significant moment in the Wars of the Roses, with the Plantagenet dynasty permanently giving way to the Tudors - a true monarchical crossroads for the nation that would reverberate for generations to come.
This project is focused on bringing a Bosworth scenario to the table, which surprisingly is not so straightforward.
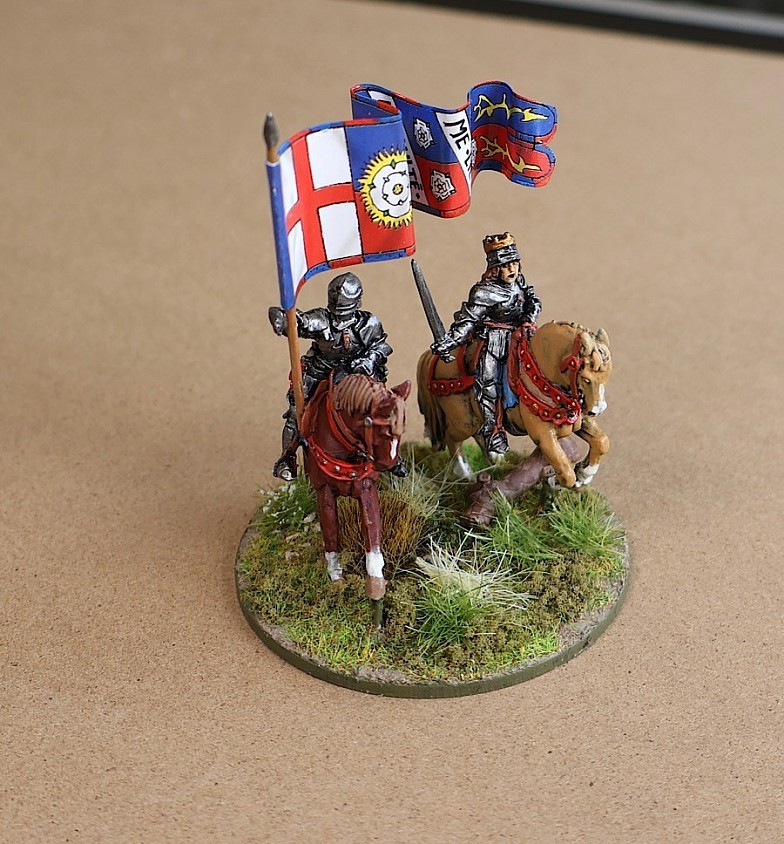
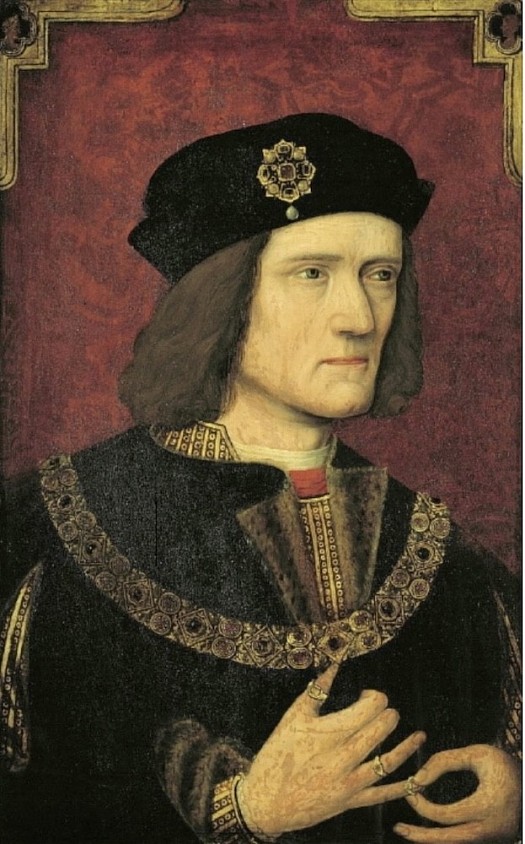
[Photo right - King Richard III with Sir Percival Thirwall].
Over recent decades, the site of the battle was thought to have been centred upon Ambion Hill, to the extent that the Local Authority established a visitor centre there. Archaeological examination between 2005 and 2010 funded by the Battlefield Trust, has since established the battlefield to actually be some two miles distant from Ambion Hill and recent authors have adjusted the narrative to accord with that.
However, when buying two books to read up on the battle, I found that each author had a different opinion on how the armies were orientated on the battlefield, one with deployment following the line of field furrows for easier movement and the other formed up against the furrow (a 90˚ difference in facing)!
Add to this the speculation as to where individual commands were located, especially as to the positioning of the Stanley contingents and what of Stanley intentions! Despite progress on fixing the battle location, we are still hostage to 'best guess' on deployment, which in one sense just makes the scenario research a whole lot more engaging.
My armies are mostly built and flagged for the 1471 conflict, reflecting the loyalties of Lords to either Lancaster or York at that time, but I won't get too bothered about that, the flags are just my eye candy rather than a source of getting hung up too much on the exactitude of patronage in 1485 - the soldiers are the thing!
Initial thoughts and sources
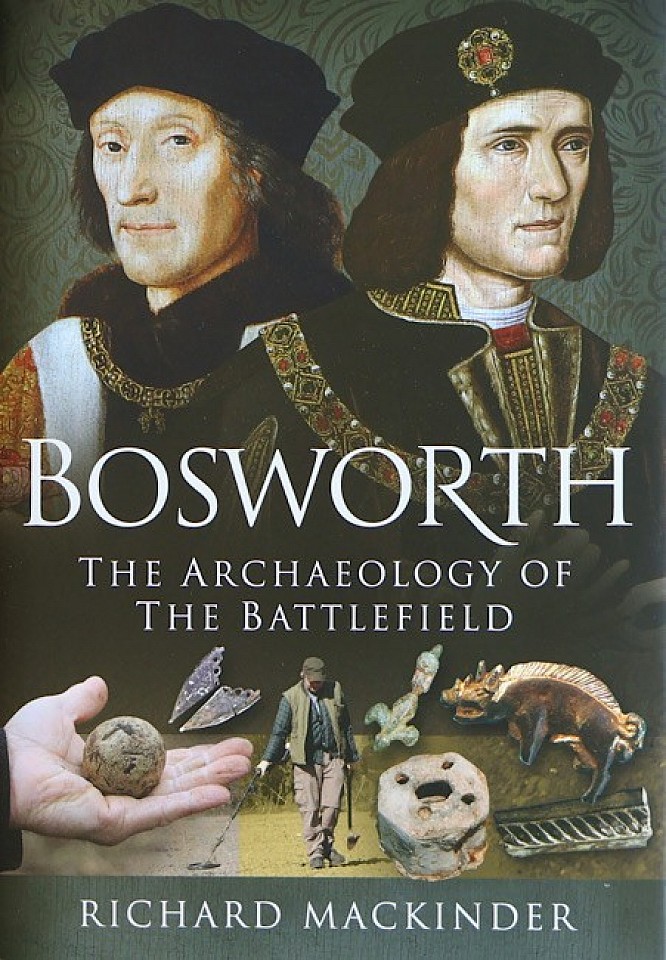
It is fair to say that for those interested in the subject, most would have had their knowledge of the Bosworth battle formed by the work of D.T. Williams, reinforced by the existence of the Battlefield Centre at Ambion Hill that includes a museum and battlefield trail around the hill.
The location had drawn minor contoversy and during the early 90's Peter Foss, in his book 'Field of Redmore', suggested that the actual battlefield lay a mile further south west.
By 2010, the well funded (1 million pounds) archeological work of Glenn Foard and Anne Curry with excavated finds was indicating that the battlefield was a further mile south west than Foss had proposed. It now seems to be generally accepted that this is the case and modern texts use location are based on that evidence.
In his book 'Richard III and the Battle of Bosworth' (Hellion & Co) Mike Ingram has the two armies facing off on an east / west axis with a marsh to the Yorkist right. He also has the Yorkist main battle commands lined up behind each other (column), with Northumberland in the rear, potentially explaining his non engagement and the positions show the armies working with the field furrows for easier movement.
Christopher Gravett in his re-working of his earlier Osprey Publishing title, writes after Ingram's book was released and he refers to it when he offers a differing view. He has the armies on a north / south axis with the marsh between the armies and positions the armies deployed fully in line, with Northumberland deployed on the left. The reason for Northumberland's apparent non-involvement is then speculated as being due to problems traversing the boggy ground and / or being held in check by the undeclared Stanley forces out on his left flank and / or simply not having an allegiance to his king.
Gravett's account for deployment does accord with the line of march of both armies.
To help the scenario designer with these opposing views, Richard Mackinder's book 'Bosworth the Archaeology of the Battlefield' offers a precise overlaying of the various archaeology finds onto a map and relates those finds to the positions of the armies. The book is an unusual and excellent technical balance to the previous two titles.
Finally, I have bought a very good source book, this being the new Hail Caesar Wars of the Roses supplement, written by Rob Grayson and published by Warlord Games and which of course includes a Bosworth scenario. This is very interesting as it is somewhat a composite of the Ingram / Gravett proposals, but looks a very interesting set-up in its own right.
It has the armies on a sort of north / south axis, I say sort of because Henry and Richard are on a semi north east / south west axis, but it is the Stanleys who are arrayed in front of Northumberland that overall delivers a north / south preference ..... assuming the Stanleys side with the Lancastrians!
The marsh is directly in front of the Lancastrian position, because their advance along the road has brought them to this point where the marsh exists. It may be as accidental as that or deliberate as a defensive position against the much larger Royal army. I like the fact that Henry has (Captan) Philibert Chandée to his left with the continental units.
I will enjoy researching all of this and doing cover to cover reads rather than snatch browsing. The approach to battle will be important for placing the troops' likely positions and the archeology will be interesting, especially the fall of the cannon balls which may help determine gun positions, though I am a little hesitant to go all in on field finds as they can have more than one explanation.
For example the horse spur found could indicate a cavalry position or clash, but could equally be due to loss by any passing horseman and some scatter could be the fallout from assembly areas or post battle / pursuit activity or previous camps etc. It is a helpful guide, but here, the finds, particularly the cannon shot are in sufficient numbers and wide coverage that they do point to an action of whatever description.
I'm not sure that after all of this that I can pull together a single scenario that I could hang my hat on and even at this stage, I am contemplating a scenario that has a slightly randomised set-up within a tight frame of probability, so the potential for a slightly different scenario each time, perhaps more Bosworthesque than definitive, but I don't want to lose sight of the principle that I do this for fun. We shall see .... I may be some time!
Well, in the end I settled on this
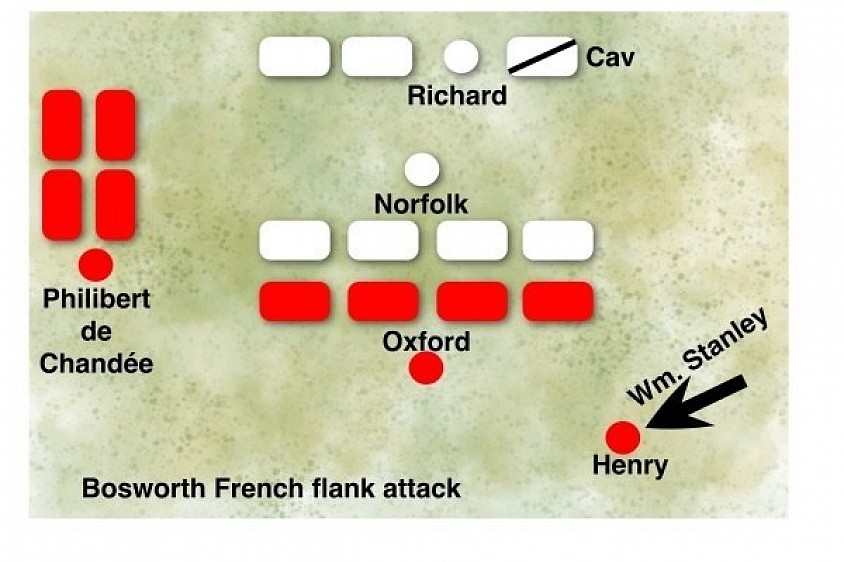
It zooms in to the main part of the action and assumes that some fighting and manoeuvre has already occurred. It makes the decision to leave some formations out of the game and as a consequence is a tad kinder on smaller collections. Since starting this folder, I have settled upon the 'Test of Resolve' rules and the scenario uses their terminology and mechanisms.
The key aspects of the design choices are as follows;
Oxford (Lancastrian main body) and Norfolk (Yorkist main body) are already in mid clash. Their archers have done their arrow thing and have now run back to the rear of their melee troops to support the clash of the melee troops!
Effect - the start positions show the melee retinues already in contact. A die roll is made for every Oxford and Norfolk unit to assess their losses up to this point. There is an uplift on the Yorkist die roll of +1 because they had historically been getting the harder time of it.
Northumberland (Yorkist rearward) has already started moving away from the battlefield without making any intervention on Richards behalf. He will not appear in the game.
Artillery (both sides) The guns are positioned outside of the zoomed in area that we have chosen to represent. They have already been in action as the armies approached each other, raking into the flanks of Oxford and Norfolk. They are in the main not mobile enough to reposition themselves within our time frame to find new targets that are not blocked by friends (Richard had an advantage in artillery, he could have sorely done with them being in a different position to counter the French threat). They will not become involved in the game.
Lord Stanley is assumed to stay out of it. He is generally judged as being a commander who hedged his bets on which side to join, but evidence suggests he has already given the nod to supporting Henry. Either way, he did not intervene, so he is not represented.
Sir. William Stanley was positioned closer to Henry. He mostly stayed out of the action, but in the last moments of battle, when Richard moved against Henry directly, he did send his men forward to assist Henry and it was likely his men that cut Richard down.
Effect - Sir William is off board, but once the Yorkist event card goes into the draw deck allowing Richard to directly charge Henry, then at the same moment, the Lancastrian event card will also be put into the deck that will allow up to two of Sir William’s melee retinues to attach themselves to Henry. The consequences are then hostage to the card sequence of play as to whether Richard can reach Henry and kill him before Henry becomes reinforced and it gets harder to do that.
It appears that the French contingent (includes Scots) that Henry brought with him when he landed in Wales, has not been given the recognition in Tudor accounts that they deserve, feeding into a narrative that they were simply part of Oxfords line. Ingram elevates their involvement as being a fully independent battle that skilfully appeared on the Lancastrian left flank, surprising Richard and threatening to roll up Norfolks battle. Ingram goes on to give the French mercenaries the status of being the Lancastrian vanguard (not Oxford).
This is likely based around the source of Jean Molinet, who wrote about the battle five years later in 1490. He was a continental and a professional historian. He was not present at the battle, but took eye witness accounts from the soldiers returning to the continent. As a source, he might be valued as offering a counter to the Tudor propaganda machine and so I have chosen to give some weight to his account, accordingly the French and Scottish contingents have a significant role.
Effect - the French threat is very real and Richard will likely become compelled to use his own battle to deal with the French attack, rather than perhaps being free to choose to move forward and support Norfolk to stand against Oxford. Again we have a race, can Richard re-orientate and engage the French before they advance on Norfolk, tipping him over the edge.
Ingram and Gravett disagree on the orientation of the two armies, however they both agree that the marsh was on Oxford’s right and so the effect is that Oxford’s frontage is restricted in length, but so is the Yorkist army where it contacts the Lancastrians and the effect of that is that Richard will not be able to bring his overwhelming numbers to bear early in the fighting. Gravett has Northumberland on Richard's far left. Ingram has him located behind Richard, so that the Yorkist are deployed in depth. Neither matters as we have discounted Northumberland from the battle. The road doesn’t matter and it is being left out, so in effect, orientation is not a thing for us to worry about today.
The cavalry Swan Song - Richard charges Henry with a couple of hundred mounted household (classed knights or superior in the rules). This was due to some desperation on Richard’s part, a sort of do or die moment. I have called the scenario ‘This day I will die as a king or win’, these words uttered to the foreign leader Salazar, who urged Richard to escape. So we have this important element that Richard is determined to see this through, yet we must also acknowledge that the charge may not have been possible if the gap had not existed. However, I wanted to help the possibility of this important moment occurring (like the official Test of Resolve scenario does).
Effect - Once Richard's army loses two retinues, the Yorkist charge event card is placed in the card discard pile, at the same time, the Lancastrians place their Sir. William event card in the discard pile. Next turn onwards, the order that the shuffled cards are drawn may bring about the famous charge and the reinforcing of Henry by Sir. William’s men running to his aid, in either order, or perhaps not at all. [note to those not familiar with the system, there are two End of Turn cards, when the second is drawn, all the cards are re-shuffled into a new draw deck …. So anything can happen and in any order. Can Richard deal with Henry before Sir. William’s men intervene!
Winning - obviously if there is only one survivor in the Richard / Henry exchange, then the survivor wins, the crown will be upon their head. Regardless of that, a game also ends immediately that a side loses six units.
This supposes that if the Yorkists lose that many units, it will mean a collapse of their army (Northumberland has already gone), the Lancastrians will be too numerous and organised well enough so as to ensure that Henry’s physical position is safe, plus both Lord Stanley and Sir. William Stanley will likely have shown their hand in favour of Henry, further putting the remnants of the Yorkist army at risk. Richard will have been out-manoeuvred, but will still be king …. So who knows what would happen then!
All of this has been taken into account in version 1.2 of the scenario. I have made this available in my Google Drive, link below in the Resource section.
Resources;
A download of the scenario PDF V1.2 LINK
https://drive.google.com/file/d/1uBnpCDD_yfYNhXfW-TSafVsLweypv04W/view?usp=share_link
The fight
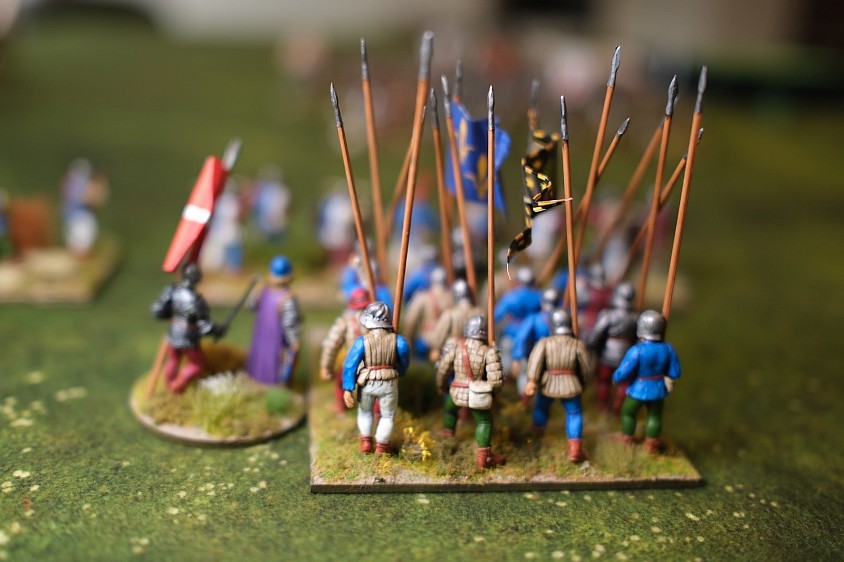
Well the game went very well, it was an enjoyable couple of hours. From the start, the French attack is very dangerous and crossbow bolts are already striking Norfolk's flank.
Richard would have preferred to send his infantry forwards to help Norfolk, but the distraction of the French and Scots on the flank takes priority. Surprisingly, Richards billmen do great harm to the French and due to a very lucky die roll (the system uses D12's), the counter-attack by the French pike falls apart!
The two other things of importance are, that Richard does not get to strike out at his adversary, Henry and Norfolks battle collapses and so enough Yorkist units go into the dead pile, that the victory level of 6 is surpassed and Henry Tudor wins ........ but in this game, Richard lives and leaves the field.
That means this must rumble on, with another battle being the most likely outcome. I have played through a number of strategic manoeuvres based on actual mileage between points and the rates of march of a typical medieval army. I wasn't sure how this would unfold, but this is where the storyboard took me;
Manoeuvres post Bosworth
In the Year of our Lord 1485, in the Parish of Dadlington, Richard, our most noble king was sorely put to test by Henry Tudor, aided by the treachery of the Stanleys. With troubled days ahead, only loyal hearts can save all.
22nd August 1485
Bosworth battlefield lay strewn with the dead and the dying. The Lancastrians under Henry were victorious, but Richard III, the legitimate king was still alive.
Towards the end of the battle, he had observed Sir. William Stanley send contingent after contingent of billmen over to Henry’s position and sensing that the odds were now heavily stacked against him, he heeded the advice of those around him and withdrew from the field with his body of horse.
Politically, he needed to be in London (south), but militarily, the moment called for him to move towards his northern strongholds. First he much catch up with Lord Percy (Northumberland), who just hours before had retired from the battlefield without becoming involved in the fighting - if nothing else, Northumberland’s force was at least fresh, offering some security if pursued.
There was of course the question amongst Richard’s party as whether Northumberland could be trusted, but Richard, ever pragmatic, knew that if he was to defeat Henry and the rebellion, then he must galvanise his northern support, not divide them. He was also somewhat accommodating to the fact that had Percy become involved in the fighting, his force would have been at least roughly handled and more likely destroyed, better to have Percy as a significant cadre to build another army around.
Choices for Henry were a little less clearcut. He was grateful for Sir. William Stanley’s intervention, but vexed that his support had only become so obvious, late in the battle. Of more immediate concern was why Lord Stanley had chosen not to show his support more demonstrably, but diplomatically he accepted the excuse that Stanley had been guarding the rebel flank from a possible manoeuvre by Northumberland.
Never-the-less, Henry was reluctant to send the Stanleys and their fresh cavalry in headlong pursuit of the fleeing Yorkists …. he wanted them on a tight leash for now! Not that the Stanleys had any hope of convincing Richard that they were still loyal to the crown - those bridges had been well and truly burned.
Instead, Henry sent off Sir. John Savage and his light cavalry to follow the retreating Yorkists and establish their movements and intentions
In due course, Henry would follow, taking the army to Nottingham, a Yorkist stronghold and a days march away. He believed Richard would retreat to that position and attacking him early, before he could recover his strength had obvious advantages. In any case, Nottingham, was a central location, if Richard had escaped him, from there Henry could strategically move either north or south as the situation dictated.
First, he needed to rest and re-supply his army. He sent heralds to the major population centres to give the news that Richard and the royal army had been defeated in battle and actively went about recruiting, hoping to persuade those who had hesitated in joining the rebellion, to do so now.
Time was not on Henry’s side, his war chest courtesy of the King of France (Charles VIII), still had the funds, for now, so he could continue to pay his French mercenaries and of course to others, he could make promises of titles once the crown was his!
1st September 1485
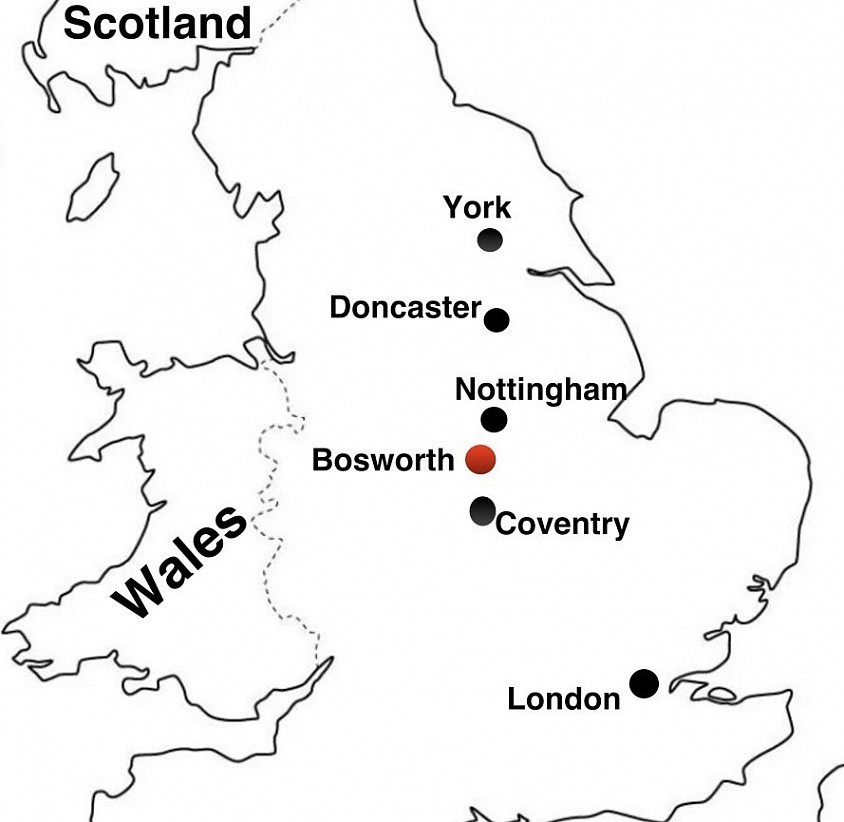
Ten days later, rested and re-organised, Henry had learned that rather than falling back on Nottingham (central England), Richard had moved North, with York being his likely destination.
Henry’s ranks were starting to fill with persons of note declaring their support. He was ready to start moving.
The French and Scottish mercenaries under Philibert de Chandée would form the vanward, John de Vere 13th Earl of Oxford, reinforced by Edward Courtenay, Earl of Devon, took the mainward and the Stanleys were entrusted with the rearward.
In Henry’s most trusted circle was his uncle, Jasper Tudor, Earl of Pembroke. He would command a small reserve of 200 mounted men-at-arms. The total size of his force at this time was around 12,000 fighting men.
Henry voiced that this force, which would likely grow while marching, was strong enough to take control of London, from where he would have access to the Royal Treasury and operate the levers of power, such as denying Richard of tax revenue and in particular calling Parliament to consider Richard being declared a traitor.
Philibert de Chandée instead advised that Henry move north towards York and deal with Richard quickly by bringing him to battle (again). His caution lay in the question of how easy it would be to practically control London while King Richard was still at large. ‘We shouldst cutteth off the vip'rs headeth’.
Both Oxford and Jasper Tudor agreed with the French commander. However, the Stanley’s felt that the London option was the best, but Henry read their eagerness as the Stanleys reverting to a ‘hedging of bets’ stance, typified by them avoiding a commitment to conflict whenever possible and his mistrust immediately encouraged him to put his authority behind the decision to seek Richard out for battle. They would march north!
5th September 1485
Richard was both grateful to see the degree of potential support that remained loyal to him, but personally frustrated by virtue of his impatience at wanting to start the march south now, but he had heeded the warning of Viscount Lovell that the army was not yet ready.
The harvest was still being brought in and so the magnates had fewer men to spare than might otherwise have been the case.
Richard had lost most of his guns at Bosworth, but had managed to secure a small artillery train from northern nobles and local town arsenals, though a little time was needed for them to be assimilated into his army.
At a Council of War, it was agreed that the army should, if possible, avoid an engagement with the rebel army until such time that support from the south had joined the ranks of the royal army. With Henry likely to control the north/south road at Nottingham, they settled on Coventry as being the most practical rendezvous point for two weeks' time … 19th September.
To make Coventry for that date, Richard’s army would need to start the 120-mile march in four days' time, on the 9th September, the 11th at the latest if the weather held. There was a renewed urgency in preparations.
Percy (Northumberland) would take the vanward, reinforced by additional bowmen from Viscount Lovell’s contingents. Richard would take the mainward and John de la Zouche the rearward. Confidence amongst the royal army was slowly being restored. It was time to take the fight to Henry.
6th & 7th September
Henry’s army had marched the 35 miles to Nottingham, an important position in central England, that governed the north / south movement between York and London. He was convinced that Richard would only have one of two objectives in mind, Nottingham or London. From here, Henry could intercept that expected approach.
He now needed to know where Richard was. He was certain that the impulsive king might already be on the move to Nottingham. Light cavalry were sent up the northern road to Doncaster (50 miles away), with instructions to report back on any enemy movement.
Unbeknown to Henry, at the moment, the royal army was of course still in York, making final preparations to march.
7th September.
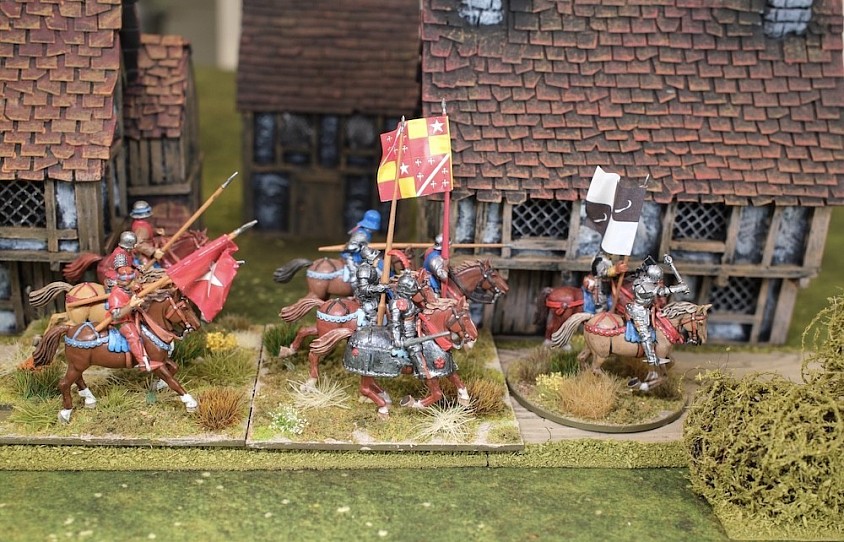
As Henry’s cavalry pushed hard to get to Doncaster, they reached the Hamlet of Piggy Longton, in the Parish of Dungborough, estates controlled by the Yorkist, Lord Darcy (above photo).
Here they met determined resistance from Darcy’s Household and leaving several dead behind, they were forced to retreat. Denied the bridge crossing at the Smoggy Brook, they were forced into making a long detour to reach the safety of West Rottington, on the estates of Lord Trebian, a loyal Lancastrian, where they rested their horses and tended to the wounded, before pressing on for Doncaster.
9th September
Richard’s army left York in a grand procession surrounded by music and cheering crowds. For a recently defeated king, he was in high spirits and the morale of the army was good.
His planned route was to be made via Doncaster, down the north / south road, leaving the main route road at Spink Hill and moving on down through Chesterfield, Derby and Tamworth, allowing the army to approach Coventry from the north west, avoiding Nottingham altogether. This approach brought its own perils as the area around Derby was under Stanley influence and Richard doubted that his army could move here without Stanley being promptly informed!
13th September
Richard reached Doncaster, his approach was observed by Henry’s light cavalry, who promptly withdraw to shadow Richard, while sending fast riders back to Henry to advise him.
Elsewhere, Thomas Holmes, acting as herald, was carrying an instruction from King Richard for John de la Pole (Lincoln) in London, to bring forces to Coventry by the 19th September.
Holmes had already been delayed once at West Rottington due to the presence of Lord Trebian’s Lancastrian patrols. Now he was delayed again at St. Albans, just 20 miles outside London, but this time he was rumbled and detained.
Under questioning he revealed the stated aim of his mission. Fast riders were sent to warn Henry, who was still at Nottingham (100 miles away).
14th September
Once Henry received the news that Richard had reached Doncaster, his army began their march to meet him, by the end of the day, reaching the monastery Felley Priory. Richard was at Bramley (just 30 miles apart).
16th September
On hearing the report from St. Albans, that the royal army intended to gather at Coventry on or about 19th September, Henry now knew not only where Richard was, but where he was going to.
He could not allow that rendezvous to occur, a reinforced royal army might spell disaster for his respectably sized force of 12,000 men. He decided to deal with Richard immediately and then turn back south to face the southern Yorkists gathering at Coventry.
By the end of the day, his army, moving north, was approaching Bolsover. Reports were coming in that Richard’s army was just 8 miles away at Spink Hill. The area was pro-Lancastrian, with his uncle, Jasper Tudor having title to the land.
With the approach of night, Richard had set up camp on Spink Hill. His patrols returned with news that Henry was nearby. How unlucky, he had just narrowly missed avoiding Henry altogether. If he would have had just 24 hours march on Henry, he would likely have been ahead of him, passing Chesterfield and on the way to Derby. Instead, Henry’s army was too close and in the morning there would be fighting. Another chance perhaps, to once and for all, settle this festering civil war.
The armies would meet at Oxcroft, a featureless, farmed plateau, with its crop of peas, beans and late barley, still being lifted.
17th September 1485 - the armies approached each other, this battle would over-shadow Bosworth in its significance ….. the Battle of Oxcroft Field!
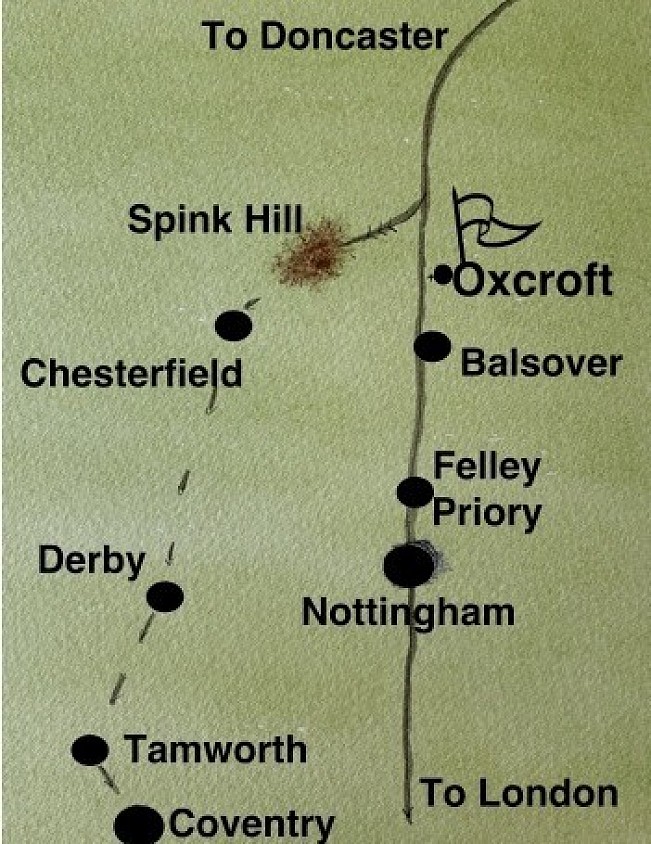
The Battle of Oxcroft Field
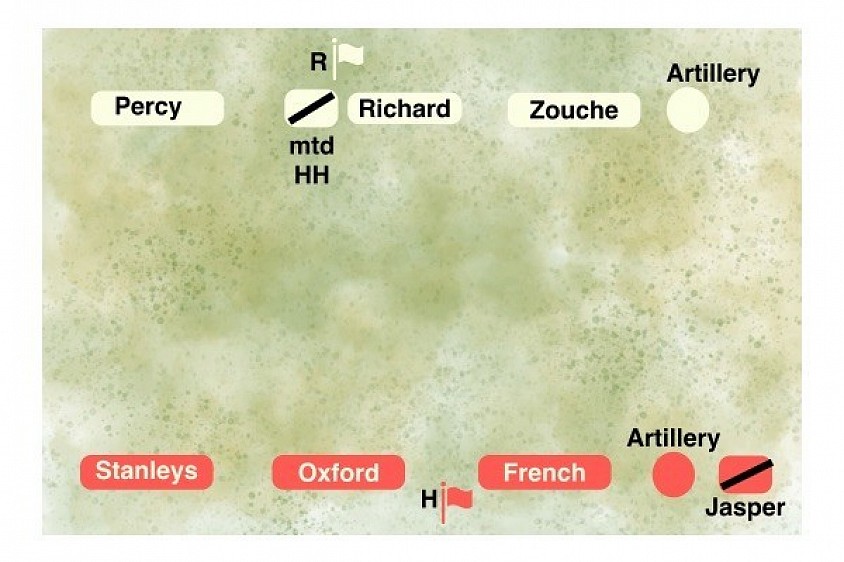
Quite a lot of thought went into how to put together the Battle of Oxcroft Field. Essentially some firm decisions were made about what to include, but then the Random Unit Creator and the Unit Quality chart from the Test of Resolve rules were used to take a goodly amount of the scenario building out of my control.
Further the dice helped with the placement of some elements. This all helped mix things up a bit.
So we have the Stanley rearward with extra melee troops, Percy's vanward with extra archers, Richard with inferior (levy) billmen! Lord Zouche with pretty much everyone inferior, the French Mercenaries being competent with their handguns, crossbow, pike (long spears) and billmen and finally, Oxford misses out on a men-at-arms unit, no doubt due to excess losses, just a few weeks ago at Bosworth.
It is all to fight for. I ran the battle and found it a good gaming experience, but all is outline in a post at the Battlefields & Warriors Blog and so to save giving spoilers here, please use the link below, for the battle that becomes more important than Bosworth :-)
LINK
https://battlefieldswarriors.blogspot.com/2026/08/the-battle-of-oxcroft-field-17th.html