Dear Diary - a rolling 4 months of comment
A Bosworth scenario and replay.
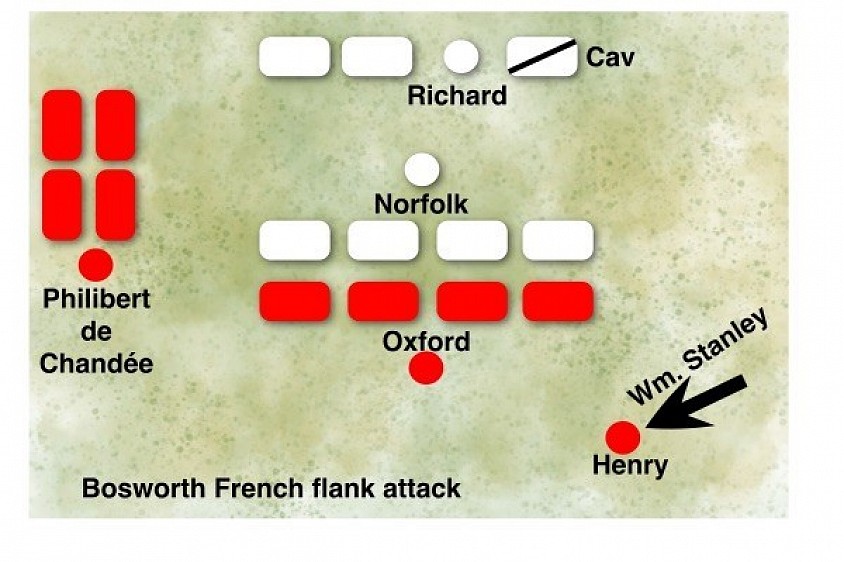
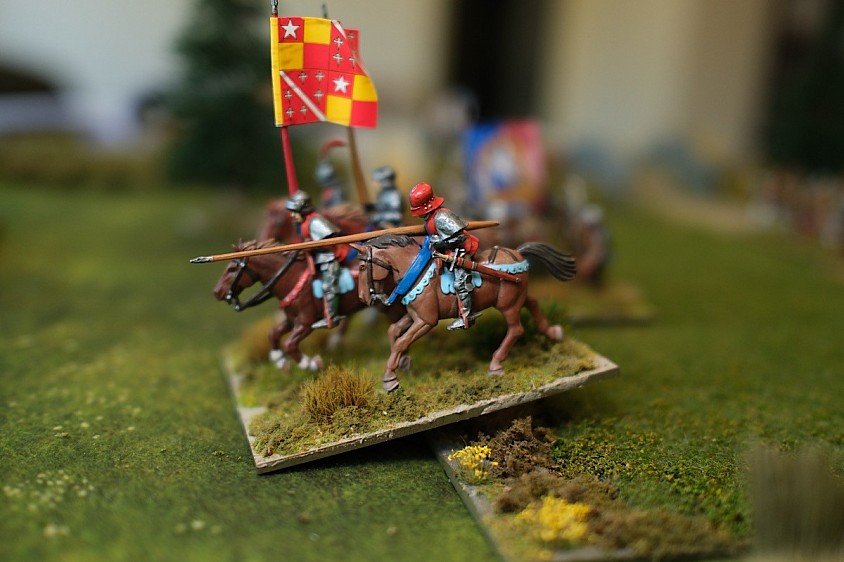
I have been working towards putting together a Bosworth scenario and became both intrigued and frustrated at the conflicting accounts.
Of interest is the mention or lack thereof of the French and Scot soldiers that had landed with Henry on the Welsh coast as his invasion force and how they may have influenced the battle.
Anyway, in the end, I have gone for a bit of a zoomed in look at the battle. One of the sources that I am giving voice to is Jean Molinet, a Burgundian chronicler and though he was not at at the battle, he wrote an account just five years later, based upon interviews of mercenaries that had been present, returning to the continent.
His relevance is that he is a counter-balance to the Tudor post battle propaganda, which has tended to underplay the significant of the French and Scot contribution to the victory. Molinet’s text brings a different perspective of their involvement.
Against him, are the hugely inflated numbers of army size that he quotes, but that may simply be his witnesses exaggerating, while on points of fact such as where they were in the line and how the battle unfolded might be considered more accurate.
Anyway, by-the-by much of what I have gone with accords with the recent writings of Mike Ingram in his Bosworth book about the newly discovered location of the battle and also the official Test and Resolve Bosworth scenario by the rules’ authors.
I have put a full description of the choices made in the scenario design and a brief AAR of its first playing, up on the Battlefields & Warrior Blog. LINK
https://battlefieldswarriors.blogspot.com/2026/07/bosworth-scenario-building.html
Magazines
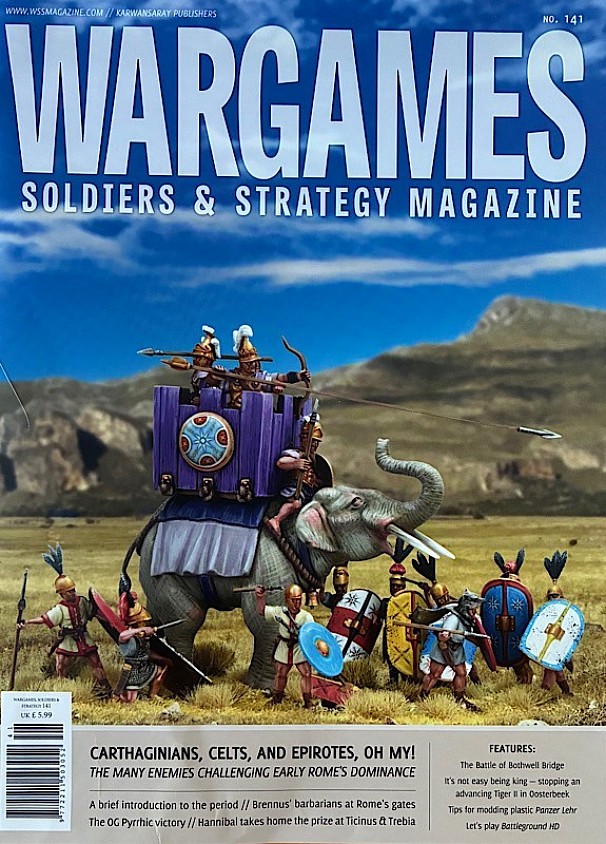
New out, issue 141 of the bimonthly Wargames Soldiers and Strategy.
The UK is about to go through a period of uncertainty as far as magazines are concerned. As a major news chain on the high street and magazine distributor, WH Smith has been a familiar name to all and one that has surprisingly been in business since 1792 (yes, over 200 years).
Last year it was bought out and re-branded as TG Jones (everyone I know still calls it Smiths), but sadly, the brand is looking at seriously downsizing their presence on the high street.
The consequences for the magazine industry are significant and over the past month, I have noticed in my supermarket that the range of mags on the shelves has doubled, as titles seek to keep a public presence. Also some magazines have been giving very generous offers on yearly subscriptions, to hoover up those customers that currently buy off the high street.
As an example Miniature Wargames (monthly) in the August issue is offering 12 months subscription for an amazing £9.99 demonstrating their need to protect their sales base.
We can only wait and see how all of this plays out. I have noticed that one of my photography magazines and an art magazine are now appearing on my supermarket shelf.
Anyway, we have three wargame magazines in the UK, so fingers crossed for them.
Today I picked up Wargames Soldiers and Strategy issue 141, my favourite mag and probably the one I am most likely to subscribe to. Their rate is 39.50 Euros for 6 issues (1 year), which I think is around £35.
The theme is about the enemies that challenged early Rome's dominance, but there is a good spattering of other topics too, including Monmouth's First Rebellion, a Boer action, Airborne at Oosterbeek and the 1945 Siege of Königsberg. There are replay articles on the 'Battleground HD' system and 'Sand' game, plus the usual columns and reviews etc, so looking like a good cover-to-cover read for me.
As to the Roman related stuff, I was pleased to see a Trebia scenario in there, with the supporting photographs showing the Epic figures from Warlord Games. I'm not sure though that I like the block effect of the infantry.
Anyway, good luck to all of the magazines and to TG Jones and their staff, hoping that closures are not as serious as anticipated.
Reading and scenario building
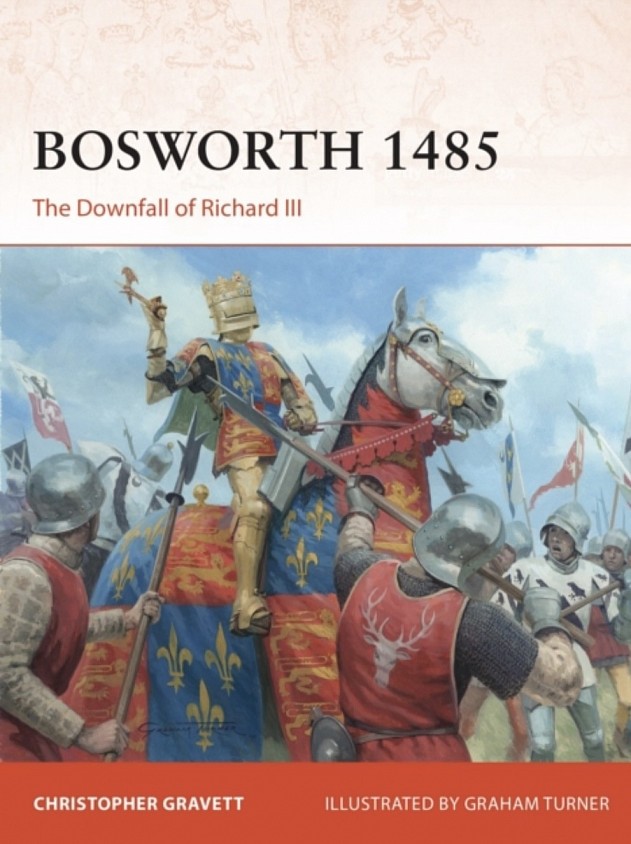
Bosworth 1485 - The Downfall of Richard III by Christopher Gravett, published by Osprey Publishing
There is now a watershed for the telling of the Bosworth story.
Prior to 2009, the account was centred on the battle taking place at Ambion Hill, very much reinforced by the Local Authority deciding to build their visitor centre there, together with an associated battlefield walk.
In 2009 two archeologists, Glenn Foarde and Ann Curry, funded to the tune of one million pounds, discovered that the battlefield was actually 2 miles away from Ambion Hill. The new site was complete with finds of artillery shot and some artifacts, though notably no arrowheads have been found. It is broadly accepted that this is the site of the battle.
Christopher Gravett had already written about Bosworth for Osprey before 2009, so this new book was a re-evaluation based around the new location and evidence.
We get the usual style and format of the Osprey ‘Campaign’ series, so it is an easy read with plenty of illustration and good maps that support the account.
It begins with a bit of background to the Wars of the Roses and then moves on to the reputations and personalities of King Richard III and Henry Tudor.
Henry, part funded by France, lands in Wales with his invasion force and then we have the important indications as to how popular his grab for the crown might be, by those on his journey who fall in behind him and those who are less certain bedfellows.
Once we get to the battlefield, the intrigue of who will remain loyal, switch sides or just not participate in the fight becomes key to developing the battle story, but it is all somewhat tamed by the simple fact that despite this being a pivotal late medieval battle and occurring just over 500 years ago, we are still unsure about many things, including how armies actually fought, where they deployed and the true actions / intentions of some key commanders.
The battle is described in some detail, with Gravett taking the view that the king’s army was deployed in a very long line, which would have put Northumberland on Richards left flank and by implication, on the other side of the marsh, with Northumberland and Lord Stanley perhaps holding each other in check.
The text concludes with a summary of Henry’s later years as king.
I have been wanting to do a wargame scenario on this battle, so I deliberately bought this title as a post 2009 guide to the latest thinking on the battle location, the line of march, the dispositions and the conduct of the battle and it does a good job in imparting the necessary information and taken alone, I would have accepted all of that.
However, I also bought Richard III and The Battle of Bosworth by Mike Ingham, published by Hellion, which is also a post 2009 book, so that I would get the broadest picture possible of events.
Both books are very good ……. But, rather than help the scenario build, they disagree on battlefield deployment, with Ingram having the armies located parallel to the Roman road, fighting across it, while Gravett has the armies positioned as though they had deployed directly from road march, fanning out, so that the road ran through both armies.
The difference between the two accounts gives a 90˚ tilt of the battlefield. From a scenario design perspective that is not as significant as it might seem as both accounts maintain that a marsh covered Oxfords right flank and we can use that as a central pivot.
Where there are important differences, it is on the actual deployment of troops. As stated, Gravett has Northumberland in extended line beyond the marsh, which in effect isolates his influence from the fighting between the vanguards of Oxford and Norfolk, though does put him closer to the Stanleys.
By contrast Ingram has the royal army deployed in depth, with Norfolk in front, followed by Richard, followed by Northumberland. This puts the entire royal army in front of Oxford and the impact of the marsh is one of simply shrinking the available frontage of both armies to fit that gap, though again making it harder for the royal army to bring their full numbers to bear at once.
Ingram takes us a step further by showing the French contingent suddenly appearing on the left of Oxford, in effect becoming an independent flanking force arriving against Norfolk and Ingram goes as far as to describe the French as being Henry’s vanguard. [the sentiment being that though the French presence was important to the outcome, it has been deliberately diminished by subsequent Tudor accounts].
So having found a new battle site (not Ambion Hill) the narrative of deployment is still open to interpretation, which I find frustrating from a scenario design point of view, but very satisfying from the intrigue of an evidential analysis perspective.
Rather than choosing which text I prefer, it leads me instead to conclude that each book enhances the other. Both reach their conclusions by evidence / source based reckoning. I’m not sure how Ingrams version of the meeting forces wheeling from road movement, to moving either side of the road in such a clean and tidy way works.
The Gravett solution deals with the approach of the armies by road, with the forces fanning out from march formation into position, with the road ending up running through the positions of both armies.
I do like that Gravett opens his account with the advice that ‘What follows is one view of events on that summer day in 1485’, Ingrams account might as well say the same thing and so both books sit easily on my shelf to be enjoyed.
From the Book;
‘The retainer recruited men from his own household and obtained lesser men such as archers or billmen, from his tenantry, paying for their services.’
‘The Song of Lady Bessy says Lord Stanley, Sir William Stanley and Gilbert Talbot met together 3rd May and pledged support for Henry’s bid for the crown.’
‘Even Lord Stanley was granted permission to return to his seat at Lathom in Lancashire to organise his troops.’
‘The rebel division manoeuvred left, keeping the marsh to their
right side.’
‘… no arrowheads have been found, but a brisk exchange must have taken place as the distance between the two sides closed. It would also be at this stage that any hand-gunners present would have opened fire.’
‘During this struggle between the vanguards, Norfolk’s troops began to lose cohesion and the line was slowly pushed back.’
‘Perhaps at this juncture Lord Stanley’s persistent refusal to join the royal army spurred Richard to demand his son’s death, something that would have been performed in full view of everyone.’ [blog note - Richard held Stanley’s son, Lord Strange, as hostage and he was present on the battlefield].
‘Salazar is also said to have advised Richard to escape the field, but he refused.’
‘At full gallop, perhaps some 200 fully armoured cavalry closed on the troops surrounding Henry.’
Resource Section.
My sister webspace ‘COMMANDERS’ showcases the various figure and boardgame systems that I am enjoying and gives a flavour of where current projects are up to. Link.
A bit of shopping
If you do a Google search for wargame or model shops in a region etc, there aren't many .... unlike the times of old!
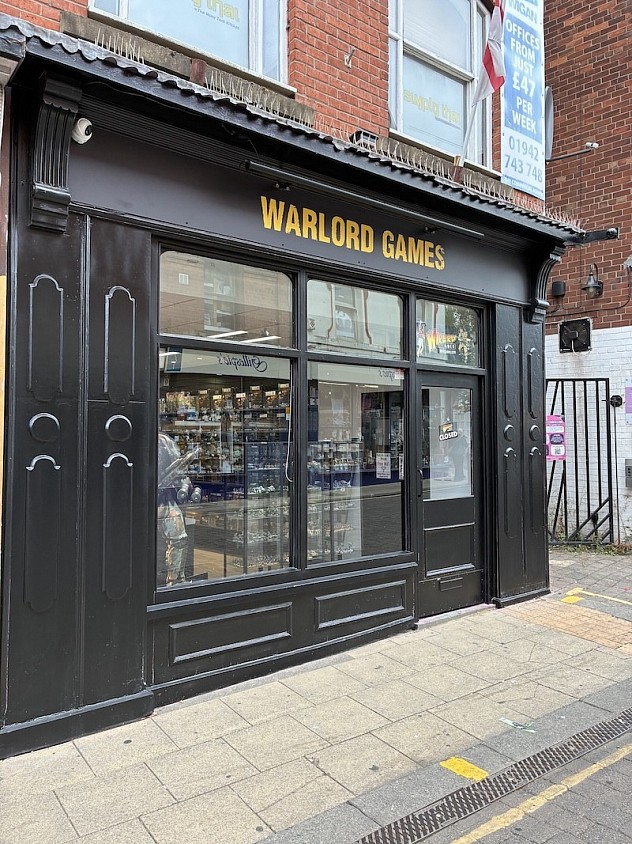
I spotted a new retail arrival in northern England ..... Warlord Games have dipped their toe into high street retail and their first shop is in Wigan.
Anyway, roadworks and the sat nav having fun aside, we got to the shop and found nearby parking, but from the approach I made, I had no idea that the shop is little more than a stone's throw from the town centre, which is vibrant and gave me a Waterstones (book shop), an HMV (Vinyl) and a very nice independent coffee house, so all told, a good retail experience. My other half found plenty of other shops to please!
Anyway, I obviously spent most of our staying time in the Warlord Games shop. They have pretty much everything 'Warlord' put out, but I was also pleased to see that they had a selection of Perry product.
There are four gaming tables in the shop and there is very much a community emphasis. While I was there, a bloke asked about Konflict '47 and the staff took some models from a display cabinet and set up a knock-about game to demonstrate the system.
I had gone with the intention of getting a small box of napoleonic Epic cavalry to base up and compare their 'look' with the 10mm cavalry base that I did a few weeks ago (80 x 60mm).
Anyway, when I got there, I got a bit overloaded with what to get and got tempted by some 28mm Pike and Shotte, the rigged ship starter set (Commander of the Seas?), the WWII naval (Pacific) starter set, 28mm 1066 Saxons (starter set) and some 28mm Perry plastic Light French Companies.
In the end I went back to the core plan and bought a box of Epic Heavy Cavalry and was surprised to see that the sprue also include horse artillery, so I have also been able to make up a three gun battery (on a single 80x40mm base) to compare with the 10mm one I made.
Anyway, an enjoyable day and hoorah for Warlord Games having a go at reversing the decline of wargame product on the high street.
Permissions on the blog have changed
The Battlefield & Warriors Blog is set up to allow anyone to comment, a good thing you might think.
Unfortunately, the blog has attracted an anonymous saddo, who has on several occasions left a block raft of words that involve text about 'wanting to die' (repeat), the sort of thing that has the potential to upset another visitor who might not be in the right frame of mind and it also creates age viewing implications, that could cause further restrictions on the blog, preventing young people from visiting.
I usually just mark it as spam, but this time, I have referred the most recent post to Google; hopefully, they can do something with the IP address. To prevent further intrusion, I have switched the settings to only allow Google account holders to comment, which identifies posters.
Fortunately, it will not impact most of those who usually comment, but it will catch a few legitimate visitors out when not signed in via Google—sorry about that! I will keep it under review.
I'm not quite sure why these people exist!
This post is repeated over on the blog - link
https://battlefieldswarriors.blogspot.com/2026/07/a-change-of-blog-settings.html
A new Wars of the Roses base
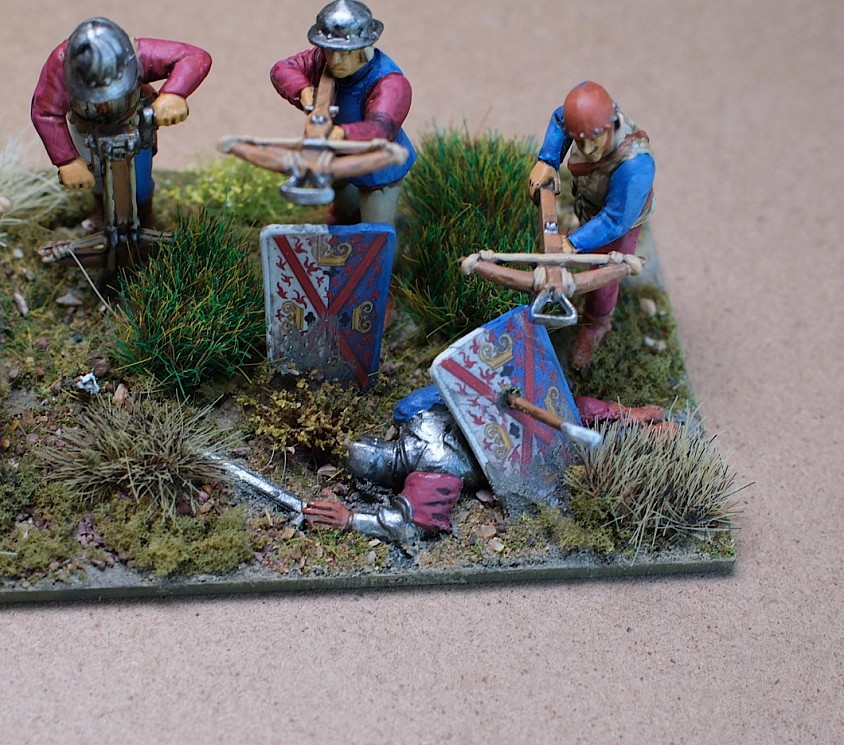
I need to double up the number of archer bases in the Wars of the Roses collection and that includes my single crossbow unit, which up until now has been fine acting as a skirmisher base.
So time to make a second base and also looking to add a (dead) man of mystery to the scene.
There is a post over on the Battlefield & Warriors site that looks at his construction and building of the base.
Link
https://battlefieldswarriors.blogspot.com/2026/07/crossbow-base-fallen-man.html
10mm Napoleonic a test run.
A couple of months ago I painted up some 10mm Napoleonics as a tester for a fast paint project.
They ended up on the table yesterday and by filling out the armies with blank bases, I set up a Neil Thomas style scenario using the Eagles at Quatre Bras rules and I must say, it was quite a pleasant knock about.
Using the blank bases helped establish a shopping list of what is needed to get this fast paint project up and running to create a pair of Pocket Armies.
The Tractor Works - refight!
This time, I managed to play 'The Tractor Works' scenario right through and hugely enjoyable it was too, both sides fully engaged throughout.
The game had a different feel to the Guards Counterattack scenario despite what essentially amounts to fighting through a building dominated landscape and I think in this case it was the difference in the force build that did that.
Anyway, there is a write-up over on the Battlefields & Warrior Blog for anyone interested,
LINK
https://battlefieldswarriors.blogspot.com/2026/07/the-tractor-works-squad-leader-aslsk.html
Polish Cuirassiers
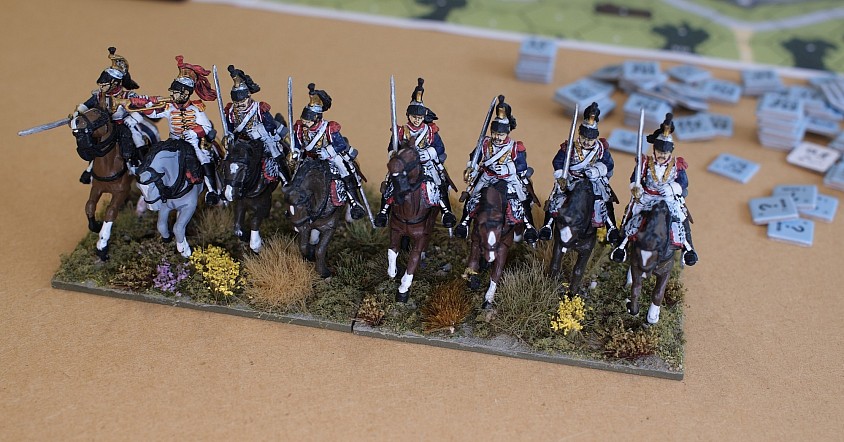
These pre-paints were bought last year from an eBay seller as a group of 12 figures, based as 4 stands of 3’s on 60mm bases, which is pretty standard.
My own basing for Napoleonic cavalry is in groups of 4’s on an 80mm base, with 2 bases per unit, so these have waited in the rebasing queue and eventually got done yesterday.
These are very nicely painted Polish 14th Cuirassiers.
Having used 8 of the 12 figures here, I am left with 4 painted figures, so to make a second unit, I need to paint up 4 more horsemen. I already have them made up in Perry plastic, I just need to paint them and try to copy the painting style, so that they match up - not always an easy thing to do, but hopefully I will get close enough.
Adding the first of two cuirassier units to the collection is a good uplift for scenario versatility and I will be sure to get them into the next game… meanwhile the French skirmishers are STILL on their painting corks! So no movement there.
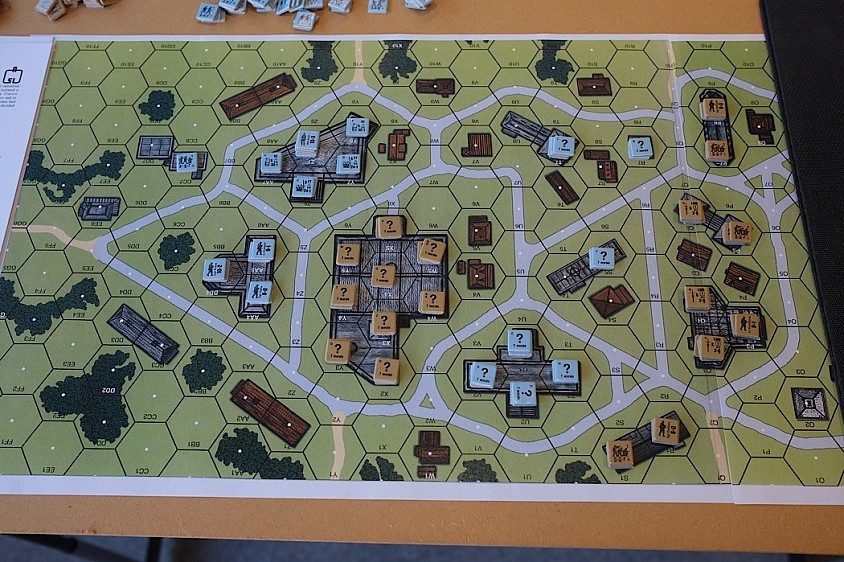
The background distraction is the ongoing Squad Leader game.
Oh B*&^%$£@!
Having set up the rather good looking 'The Tractor Works' scenario for ASLSK and playing for 2½ hours ...... I suddenly noticed that I had become confused during play and now the sides were prep firing / moving and First Firing in the other sides turn!
There are too many units interacting for the clock to be turned back and so the game has been abandoned, to be set up again!
The German 8-3-8 assault engineers are a powerful force and in my game, they were in the final process of over running the factory, though the Soviet 5-2-7 relief force were also making good headway towards the factory.
Regardless of the mistake, the play itself has been rewarding and so 'once more into the breach"!
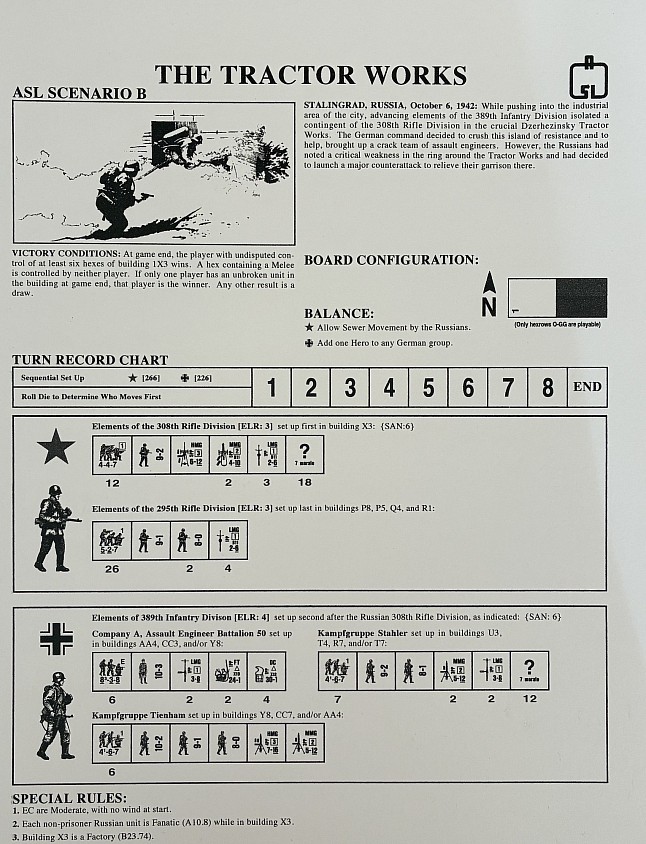
Scenario B going to the table
Having recently played the Guards Counterattack using ASLSK rules, I am setting up the next scenario - The Tractor Works.
This scenario uses the other half of Board 1 and I have also had that enlarged.
There are a lot of infantry in this one, plus specialised engineers, flamethrowers and demo charges, so I am expecting quite a different feel than the last game.
In the future I will be doing scenario C, which combines the Guards Counterattack and the Tractor Works into one game and includes some tanks, so that will be a bit of a game fest and also help reinforce the armour rules in my mind.
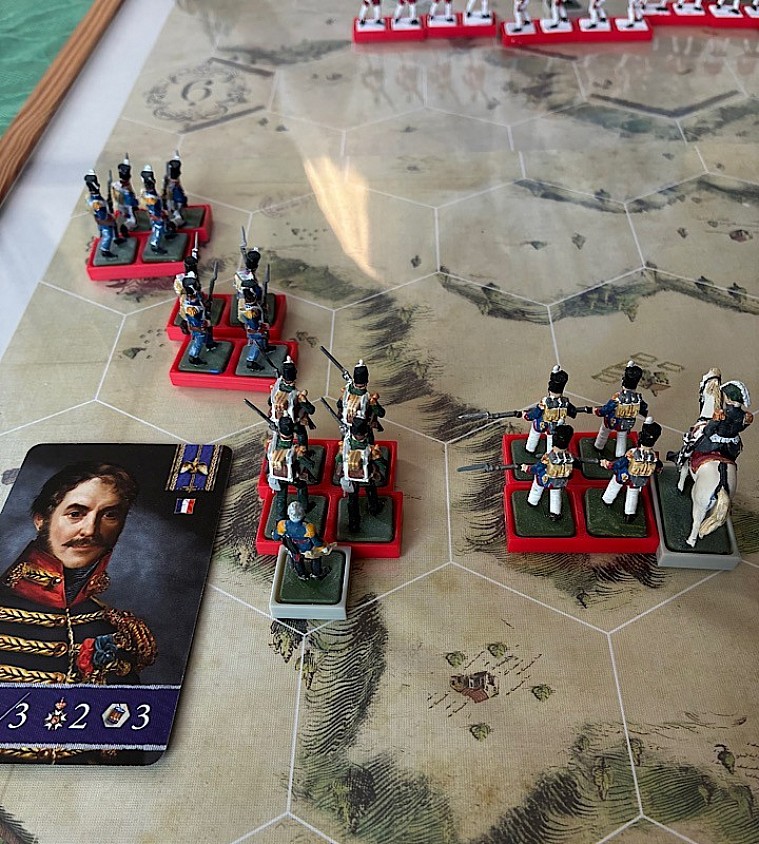
Three games of Test and Resolve
I have had another go of the Test & Resolve rules with the Ferrybridge scenario and this time I managed to work through all three linked games.
I am increasingly liking these rules.
There is a write-up with observations and pics at the bog.
LINK
https://battlefieldswarriors.blogspot.com/2026/07/returning-to-ferrybridge-1461.html
Re-basing archers, the Canterbury contingent

As I re-based the second of my Wars of the Roses archer units, I drew a base from the collection that was labelled ‘Militia’. My re-basing takes a single 80 x 50mm base with 7 - 9 archers and turns that into a two base unit with a total of 10 figures, typically requiring me to paint 1 - 3 new figures and creating two 80 x 40mm bases.
So in this instance 3 figures were painted and the above unit was created. Most of the figures are wearing red and so I have re-named it as the Canterbury archers (militia).
There is a leader in the front line (by the left yellow flower tuft), he will be our captain of the archers and represent William Sallow (also known as Sellow). As with many captains of archery from town militias, he is in fact a senior civic figure, rather than a military man.
The archers were constantly employed in local conflict, though notably were present at Empingham Field 1470.
Note the archer out on the far right who has taken an arrow to just above his knee. This is a conversion to a Perry plastic archer, the method of conversion is described in an earlier post (below).
Robert Horne was a notable from the Kent area, who recruited for the Yorkists from the local area. He fought at Northampton 1460 and was wounded ….. it's a stretch, but perhaps he is our wounded man here.
By chance, at the recent Phalanx war-game show, I picked up the flags / banners for John Wenlock and he was in command of some archers from this area at Towton 1460, so I will do a melee base with his banner to stand side-by-side with the Canterbury archers!
Out of interest, the above shot was taken during a return to the Ferrybridge scenario, which I will post about in due course,
Fighting at the Namur
Our face-to-face game yesterday evening fell upon The Eagle and the LION game, published in 2009.
It is a long time since we last looked at this and I can remember the game arriving with some fanfare... but I don't think as a series, it went anywhere after that!
Anyway, it is a mix of plastic figures (look like 1/72) on a hex grid and is a quality production.
The photo shows the left wing of the French attack, with the far left pairing being light infantry and the next pairing being line. Over on the right, out of view, there was another line unit, but it needed to change orders from manoeuvre to attack and over the course of the game, the die rolls needed to make that happen, frustratingly didn't materialise! I can understand a one or two turn delay, but at this game scale, to be out of it for the entire battle felt odd.
Despite having figures in play, it has a touch of the 'Euro game' feel game rather than a tabletop game, including card play, where players have a 'hand' which I felt was a distraction to the actual tactics going on across the board, and I seldom find cards enjoyable at any level. In the end, I just stopped looking at the cards!
There was a brief moment in the centre and I wondered how it might play out if lifted and played out on a traditional figures war-game table, so aesthetically, it does give a figures feel and I enjoyed that aspect.
I was left with the impression that the rules seemed more intricate than they needed to be and that it is the sort of game that is best enjoyed by those who play it regularly and understand all of the nuances.
