The Painting Desk
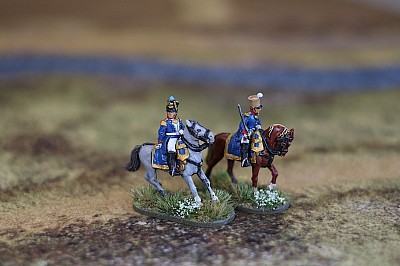
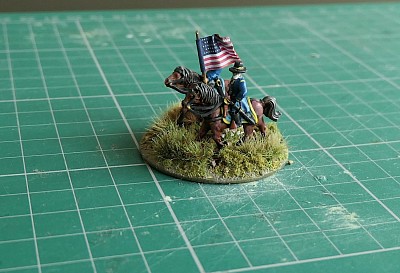
Two Napoleonic French colonels
My first trial with the Soldiers of Napoleon rules highlighted a couple of gaps in the collection that need early attention - the lack of Skirmishers and local commanders.
So the painting queue was interrupted with two French Mounted Infantry Colonels, from Perry Miniatures (French metal Pack FN4) taking centre stage. The third officer from the Pack will just have to be patient :-)
These were primed black, heavily dry-brushed (twice) and then contrast paint was used as a ground for the big areas of horse and blue uniform. This is a very fast way of getting paint down and for it to go into all the nooks and crannies, but I have never liked the look of Contrast paint alone, so then standard acrylics were used to block paint everything, including the horses and blue uniform.
Once done, a thin wash was liberally applied and then some very minor highlights put back in.
For varnish, they got a brushed coat of gloss, because they are metal, followed by a brushed coat of matt. I once read that gloss varnish is tougher than matt and so makes a good first coat on metal. I have no idea whether that is true, but I have no mind of my own, so slavishly follow the advice.
Finally they are mounted on 50mm ‘pill’ bases from Warbases using No More Nails to fix them. I find that this ‘paste like’ adhesive helps ‘settle’ cavalry down, as their own bases can be uneven underneath.
Anyway, it makes a start on what I need for local commanders and I’m sure the French will do better under their command. Two Austrian commanders are up next to keep things even.
A farm complex
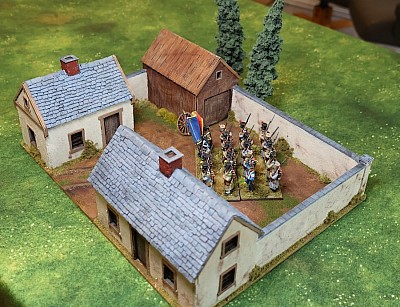
This is the 'Prussian Farmyard' MDF kit from Warbases, costing £27 at the time of writing. I had wanted a ‘farmyard’ type complex for my Napoleonic table - something that looked like a continental farmyard with a high wall.
This model comes with a base which has a very helpful compact footprint of just 8½" x 11", fine for my smaller table.
It is a relatively fast and easy build. One of the three buildings comes with card coverings to give the MDF barn a wooden structure look and that works very well, but the other two buildings and walls are plain MDF and need some help.
For these two buildings I made individual roof tiles from thin card, laborious, but worth it.
For the whole complex, I was quite happy with the whitewash look that seems common of the period, so I covered all of the walls with a mixture of white Gesso, modellers paste and a touch of Vallejo something or other that has a bit of fine sand in it. I used a ½" flat head brush to get the first coat on and then once dry applied an artist's acrylic linen colour with a very slight tint of raw sienna.
A very thin coating of the same went onto the courtyard ground for the sandy texture, with various browns then scrubbed in.
I had intended to do the roof in a red tile, just like the photograph that Airfix used on the front of their kit box, but after some internet checking, the further that we move towards Prussia / Austria, it seems that these buildings tended towards grey slate roofing, so I have gone with that.
Completed with some flocks and rattle can matt varnish, the final result is a terrain piece that is versatikle and can come out often, it will hold a battalion of infantry, scales well with the figures and has a compact base size.
Epic Landwehr Cavalry
The first reinforcement for the Epic Napoleonic Pocket Army rolls of the painting sticks and ‘ride’ into barracks.
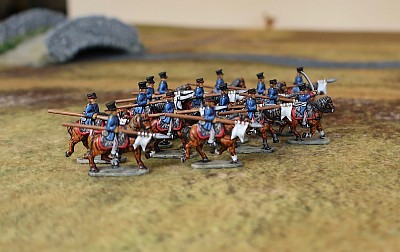
This is a unit of Prussian Landwehr cavalry that will make 3 bases.
I will be using 55mm x 25mm MDF bases to replace the 60mm x 20mm plastic bases supplied with the Warlord Games Epic figures as they better accommodate the depth of the horse models and allow the bases to butt-up to each other without horse tails getting in the way!
The reason why I have taken this picture before basing is that I was looking for a pose that I can use to try and paint the unit going into action with either watercolours or oils (I will probable try both) - a tough subject and it is years since I painted, but I thought I would have a crack anyway.
I have a painting on my wall of 14th Cuirrassiers moving up to the front during the Danube campaign and it rather inspires me to have a go.
I started these figures with contrast paint, hoping for a faster painting rate and the completed them with traditional acrylic, but overall, I done think it made that much difference and I like the look less. I will play around with this a little more to see whether there are some Contrast colours that are worth keeping.
I recently saw a very good painter do French artillery and he only used a Contrast paint on the woodwork of a cannon carriage and standard acrylic for everything else and it looked bang on.
July's painting output
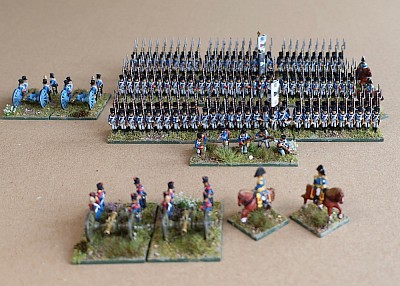
This is the start of my Napoleonic Prussian Pocket Army, except for the four bases in the foreground, which are French colonels and artillery.
The figures are from Warlord Games Epic range.
This gives me 3 infantry battalions, two musketeers (white straps) and one fusilier (black straps). In front of them there is a single base (representing a company) of jäger. To the left a battery of 2 cannon bases and to the right, a couple of mounted officers.
I thought they took rather a long time to paint, simply because their is quite a bit of detail in the figure, which I find hard to ignore.
As usual, I have mounted the infantry on 55mm MDF rather than the supplied 60mm bases.
This will give me a Prussian Infantry regiment, wich equates to a French brigade. I have identified a scenario that would allow this small force to get to the table. Next up I will do a Landwehr unit and some lancer cavalry.
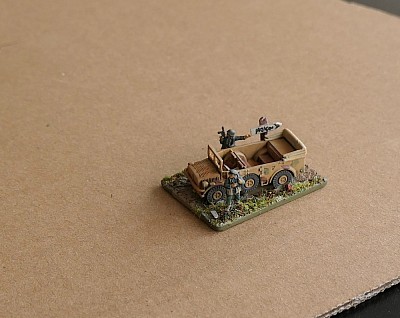
Korch 108 Staff Car
Kampfgruppe Schmidt gets a command vehicle. Not all of the rules I use will need one, but it is a handy thing to have.
Here we have the Korch 108 Staff Car, sold by Anschluss Wargames in a 3D print. The two officer figures are taken from the German infantry set by Victrix. The scale for both is described as 1/144, so is a good fit for 10 or 12mm figures and for 'N' scale model rail terrain.
There is a photo in my osprey Bulge book of a Kubelwagon on a muddy road, next to a road sign and an officer stepping into the car. This command base is loosely reflecting that scene.
I’m generally not basing my vehicles (well not at the moment anyway), but this little scene is an exception and shows my ongoing experimentation with basing styles for the WWII stuff. I am aiming for a look that will allow the force to be used pretty universally between rural and urban settings without too much distraction.
Here a basing paste has initially gone down and then dry brushed with a lighter value. Some of this has been left exposed, while a few bricks, stones and some vegetation, have been added.
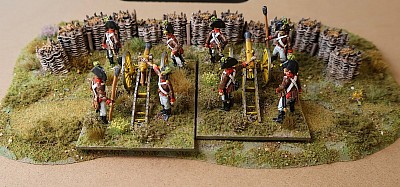
Gabion position
This is the latest terrain piece to roll off the painting tray. It combines the superb resin Gabion Defence sold by Ironclad Miniatures with a base formed from an old table mat.
With a jigsaw set at 45˚ to give a chamfered edge, an irregular shape was cut from a good quality stout table mat. With the laminate surface placed face down the primed gabion section was glued directly to the mat’s cork base using 'No More Nails' adhesive.
A couple of patches of grass mat were added and then various filler pastes were added to cover all of the remaining cork and blend the gabion section in. There doesn't appear to be any warping.
The paste and primed resin gabion were repeatedly dry brushed. The soil / earth fill was painted black mixed with dark brown, once dry, some fine gravel sand was glued onto the soil fill.
Overall, a very useful defensive position that helpfully has a small footprint of 10" wide by 6" deep. The pair of guns have a combined frontage of 120mm (just under 5").
A wash that I am now happy with.
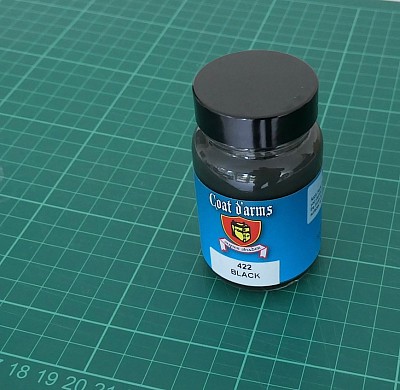
For the shading of figures, after years of experimenting with various washes and shades etc and using home made recipes involving floor polish without being fully convinced, I have finally come across a product that suits me.
Coat ‘d Arms, now supplied by Battlezone Miniatures, do pots of ‘Super Shader’ in Light Brown, Dark Brown and Black. I only use the black so have no experience of the browns, but I find it gentle, flowing into the folds and not staining the high points of the figure in the way that inks often do, but it is still sufficient to provide a unifying effect on the figure.
I have used it on both 28mm and 15mm.
The technique that I have adopted is to put the wash all over the figure, using enough ink to be liberal but not to over flood and then immediately go back in with the brush to lift of the ink in those places that it is clearly pooling.
I have no idea of the ingredients, but it does behave in a similar fashion to those mixes I have made myself using small amounts of acrylic floor polish and similarly, this product does leave a glossy sheen.
Once done, I go in with a small number of highlights and then matt varnish the whole figure. I think you could get away without adding highlights, I just like the slight ‘pop’.
It is sold in a glass jar and a metal twist lid and one of the things that I found with the first pot was that over time, the jar lid became harder to get off as the residue from using hardens and interferes with the free operating of the cap. To get around this, I now decant a new bottle into a plastic bottle that has a dropper type cap - you can pick these up quite cheaply in cosmetic shops.
Anyway, bottom line, for those that like a wash, the recipe here can be applied directly with nice results. The black is a nice tone that seems to work well across the colour spectrum.
Please note, as with everything on this site, it is paid for by me and it only gets mention here if I like it.
Terrain for Epic ACW
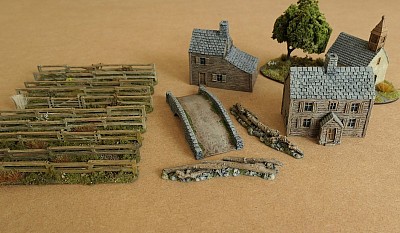
I have just completed my small project terrain set for the Epic ACW.
All of the buildings are resin and from the excellent Battlescale company. They are primed, block painted, inked and drybrushed and matt varnished and have come out rather nicely.
The chapel is based with a tree from Woodland scenics as my representational piece for Dunker Church (Antietam).
Also from Battlescale are two resin defensive positions formed from logs on a stoney platform. They look a bit large in the camera, but that is just a lens thing Vs positioning compared to the buildings.
Finally from Battlescale, a small stone footbridge, this will be ideal for creek type crossings. All of the Battlescale stuff here is 10mm, but I like terrain to be one scale below the figures.
The Fences are MDF from Red Vectors (code 15 FNC-02). A single frame gives 10 x 5” fence lengths. These were base coated, flocked with fine flock and sand and then prettied up with some tufts. These are 15mm fences, they are too big for my 10mm stuff, but work fine with the Epic.
Adding a windmill
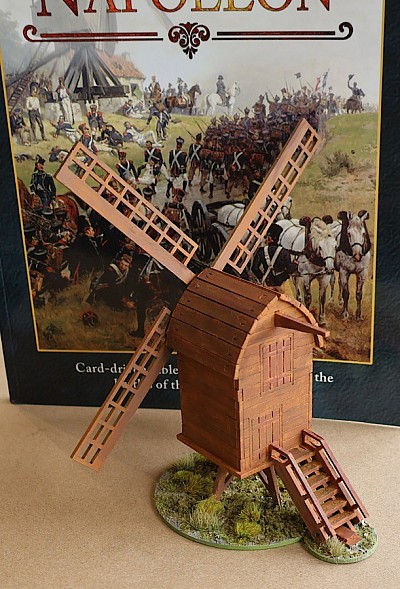
The Prussian battle box from the Epic range by Warlord Games has an MDF kit for a windmill, manufactured by Sarissa Productions. It is scaled to 15mm to match the Epic figures, but with its small footprint, it makes a useful item for the 28’s on a small table and has the advantage that it is compact enough to sit on a hill ….. as it well might!
Here it is, set against the background of the Soldiers of Napoleon rulebook.
It is a simple fast build kit. MDF and can be ‘interesting’ to paint because it is very absorbent, so I rattle can primed this in grey, but that seemed to need a couple of days to cure properly. After which time three coats of artists acrylic browns of various shades went down. I used a few weathering powders …… sparingly after the last time!
A quick spray of mat varnish seemed to undo all the good work that the weathering powders did.
Anyway, here we are. The 28mm figures look big against it, especially the cavalry, but I can live with the compromises as a true 28mm model would have been just too big to both store and game with.
I am debating whether to add some damaged canvas sails to it. Parchment paper might also work. Though it looks okay at the moment and I don’t want to cock it up!
A German Kettenkrad
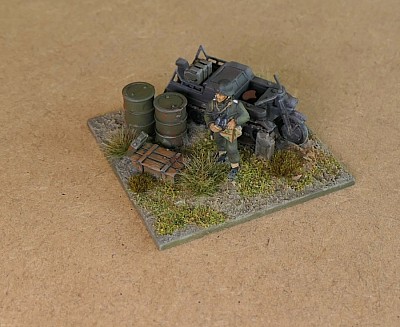
I have not seen a 1/72 Kettenkrad vehicle before. This one came in an Academy set that also included a jeep and a kubelwagen, plus plenty of fuel drums and petrol cans.
The Kettenkrad is a sort of mix between a tracked chassis and a motor cycle front end, like a trike with tracks.
I thought this might make a good objective marker or just scenic piece of interest. It was glued up (not many parts) and fixed to a plastic base together with some supplies scattered around and jerry cans on the rear of the vehicle.
This was all primed with Revell’s Tank Grey (code 34178) rattle can spray. The only bits of real colour were the jerry cans, oil drums, wooden crate and the drivers seat in the Kettenkrad. I couldn’t decide whether to do a dirty wash or not, but in the end, I’m glad I did. It worked well. Once dry everything got a very light dusting of weather powders.
For my man, I scavenged a suitable figure from one of the new rescaled German Infantry boxes by Valliant Miniatures (the Rapid Fire people). He has what is likely a map in his hands and binoculars around his neck, so of all the figures I have, he looked the part for someone involved with a small front line fuel and ammo distribution point.
Altogether a nice little piece of interest for the table and an easy mini side project.
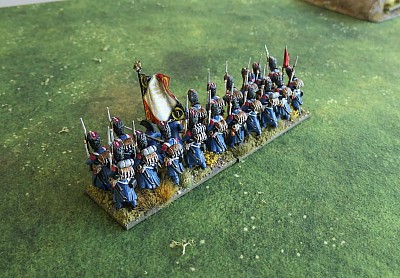
Grenadiers (Old Guard) Victrix
I am quite pleased with these as I thought that grenadiers in greatcoats might look a bit boring, but the sense of formidable does come through.
The flag is a Victrix flag. These were painted up from Wraith Bone primer with Contrast paints, a light black ink added and then traditional Vallejo paint added for highlights.
They are of course plastic. I did have some Warlord Games’ metals, but at 10 figures per base, I felt the heft was too much and so chose plastic over them.
These have had a brush of matt varnish while on the painting sticks, now that they are based and flocked, they will get a blast of rattle can matt varnish just to lock everything down.
Flagged as Lord Stanley’s men
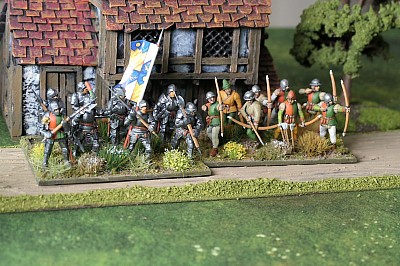
These two bases are all Perry plastic and have just come off their painting sticks. They seem to be defending a particularly flowery / tuft plot of land! :-)
They have been painted up from black primer, mat varnished and then a satin varnish dragged over the metal for some highlights.
The flag is from Pete’s Flags on E-bay, which comes as a set of three, including a banner that would be a good fit for a Stanley Command base, which might be a nice addition to do at some point for Bosworth related games.
The background buildings are from Conflix and the road from The Last Valley. The cloth is from Geek Villain.
French Light Infantry
This is a battalion of my Warlord Games Light Infantry. They are late war, so sit outside my 1809 project time frame - but that does not bother me.
They are easy to put together and come with decals to attach to the cartridge cases (slung to the rear).
There are flags in the set and I have chosen 14th Light Infantry to be represented here.
I don’t know why, but my box had 2 officers and no drummer, which is a bit of a shame.
All-told, I am quite happy with these. They took longer to paint than I would have liked, but I just need to tweak the technique a little.
Rail track and station
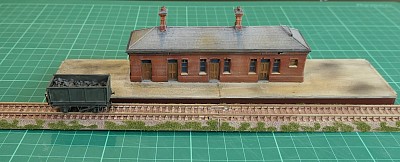
Rail model N Gauge is a good match for 10mm wargames and isn’t a million miles from 12mm, so time to put my rail kit scenics together.
Firstly the track. This is manufactured by Kato and makes for a good wargame item as track and raised bed are already built as one. I have just over 6’ of this in 8 pieces.
At first, I tried putting down an ink wash to pick out the timbers and textured embankments, but the plastic didn’t like it. So these have been acrylic primed, then coloured with a 50 / 50 thinned brown paint. Straight away I swiped the top of the rail with a cotton bud to clear off the wet paint and reveal the top of the metal rail.
Dabs of thinned PVA glue on the shoulders with Woodland Scenics ‘fine turf’ sprinkled on has just enough to get rid of the plastic look, while staying quite gentle to the eye and it will blend with the game mat.
The station building is a sort of resin / plaster from TimeCast. It has air bubble marks in it, which would normally detract and need filling, but here, I thought it gave a certain embattled look for its WWII settings,
The platform is a two part plastic kit from the Kestrel N Gauge range.
My first wagon has been added to the track. This is a self build Pico kit. I have filled it with stone chippings and painted them black, so that it looks to be carrying coal.
1/144 Stug III's
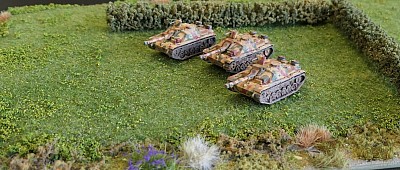
As part of my 12mm WWII Pocket Army project. The German force are getting an understrength platoon of three StuG III’s
These are 3D Printed models bought from Anschluss Wargames. They are robust, light and nicely detailed. I bought them as singles, costing £3.75 each, though they can be bought cheaper by getting the five vehicle platoon. I just like buying a few models here and there, building the collection slowly and anyway, I seldom game at a level that needs full platoons represented.
For painting, they were each mounted on the end of a coffee stirrer. As a temporary adhesive, I have been using that sticky gel that you used to see on the front of magazines that carried freebies. It is strong enough to hold the smaller scale figures while they are being painted. I buy mine on a roll of waxed paper, which lays down a bead about 4mm wide.
I used the same techniques as I was using on the 20mm figures last year and I'm not convinced that they all cross over that well to the 1/144 scale. This includes using a 5B soft pencil to highlight the tracks and spronging on a filter of watered down Vallejo German C Beige WWII (70.821).
I will keep them as they are for now, as they are good enough to knock out Shermans and T-34's :-) but I will likely go back into them at some point, especially on the running gear as my application of wash / mud and weathering powder has pretty much neutralised all of the nuanced colouring that was in there.
Base or not to base vehicles? I can never properly make up my mind on this and in the past have done both (10mm based, 20mm un-based). They do store better when based and also raise the vehicle height to remain in scale with based infantry, but I do like that when un-based, they sit on terrain better and look naturally grounded, to my eye anyway. For now they will go un-based, but this may change as the project moves forward.
Meade - Epic scale command stand
This figure of Meade is a resin, coming from the box of 5 resin Union ACW command figures by Warlord Games.
His standard bearer is from the cavalry sprue. I selected the figure that had a sabre in hand. This was nipped off at the wrist and a short length of brass wire added instead, from which the flag now flutters! I used just a dab of Liquid Green Stuff to give an impression of a hand gripping the standard.
The box art shows Meade with a white beard, so that’s what he has. The two figures were painted up, using Prussian Blue for the jacket / coat and the same with just a tad of light blue added for the pants.
I always paint my ACW Union at least one shade lighter than seems historically correct, but I just think they look better and this is even more true in the smaller scale, where a little bit of ‘pop’ is always a help.
Cardboard Workshop
Metcalfe serve the model rail sector with a large variety of card construction kits for both N Gauge and HO/OO.
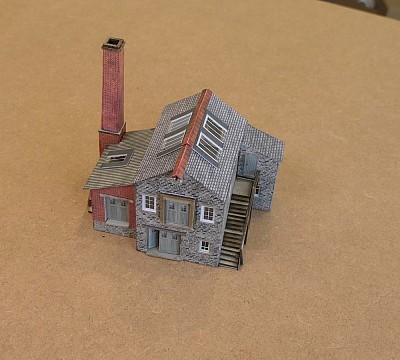
N Gauge is a useful terrain source for 10mm wargaming and so while in a model shop, I picked up the ‘PN186’ N scale Ramshackle Workshop construction kit for £12
The completed model has a foot print of 100mm x 64mm and the chimney puts it at 95mm high.
You get a good instruction booklet and I would put the build at around two and a half to three hours to make.
There are three essential elements, a thick board core, a light card full colour facia (or wrap) and some acetate to make the windows. The boards and facia are die cut. The final result is something which is very light, but strong.
Of a slight distraction is that the folds in the coloured card from the partial die cutting offer up a fine white line (i.e. the interior of the card below the printed face is exposed). For the most part this is not really too eye catching, but when you look for it, it is there.
My solution was to run a bit of thinned (with medium) grey Contrast paint along these seams with a very fine brush. The most noticeable white line is the one that runs along the top of the ridge tile, which I used a terracotta / brown mix of paint thinned down, to hide. The four corners of the brick chimney need the same colour.
Overall the effect for £12 is very good, but I can’t make my mind up about it, as I tend to go for resin buildings which give me a more rustic look, whereas the card is a little ‘sharp’ looking. I might dampen that down with some weathering powder.
Anyway, a nice little addition to a WWII built up area for the 10mm scale.
New WotR Characters
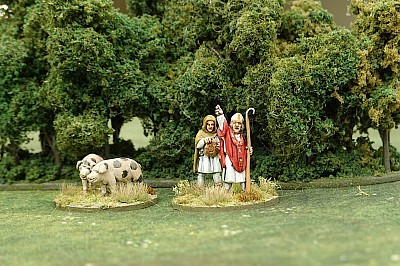
The imaginations world of Piggy Longton get some new characters.
The pigs have been painted with a nod towards the Gloucester Old Spot, though this breed would not have existed at the time, with pigs having a much more boar like resemblance. I just prefer my pigs to look like …. Pigs!
The Bishop and his attendant I believe to be Gripping Beast figures, which I picked up from Colonel Bills. After doing some ‘robe’ research, this appears to be a fair approximation of the clothing that some reference images suggested.
In my imaginations, he has been previously known as Stephen the Fearless, before taking up his priestly duties, so we will see what falls out of that!
Yorkist arrival
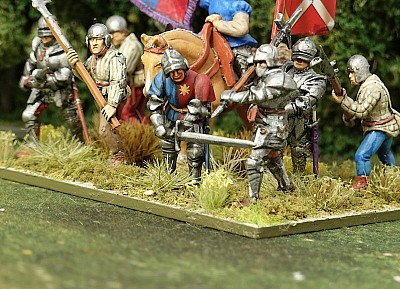
A fellow blogger kindly donated me some figures. Firstly we have a professionally painted foot knight, wearing a tabard with King Edwards livery. Having found a Perry flag from my stash for Lord Cobham, then that is who our foot knight becomes.
Also donated was a raw metal mounted herald, which I thought would look rather nice on the base. It is the first time that I have mixed horse and foot and the horse does take up quite a bit of space on the 80mm base.
to make up for that, I dropped the die holder at the rear of the base so that another infantry figure could be added.
There are some pictures and commentary over on the blog re the painting of the unit, plus details of a handy small footprint bridge from Warlord Games. LINK.
http://battlefieldswarriors.blogspot.com/2021/09/wotr-recruiting-continues.html
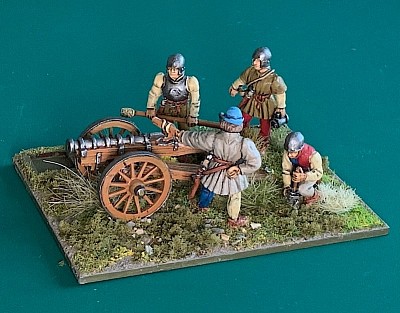
Wars of the Roses gun.
This one by Perry Miniatures, 28mm in metal and based on a 60mm wide by 80mm deep base.
A 10mm die frame has been added to the front on the far side.
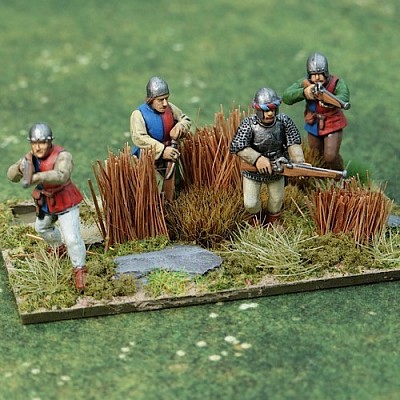
Handgunners Wars of the Roses.
Four 28mm figures from the Perry’s plastic Mercenaries box.
These are on a 80mm x 50mm base and set up as a skirmisher force. The base has had additional cover and rough ground added (some slate stone and broom bristles), just to differentiate the and their role from ‘line’ troops.
